Making a Stop-Action Animation with Linux and ScreenBlast
I had some time to kill while I reinstalled some software a week ago,
and a brand new copy of ScreenBlast 3.0.
So, in the fine tradition of old Judy Garland/Mickey Rooney
flicks, I decided to make a
stop-action animated movie .
Get the Movie .
I actually made something in a few hours, and over the
next few evenings, learned a bit more about what I should have
done and cleaned the cartoon up enough to be viewable.
Equipment
The equipment is pretty simple.
Hardware:
- Canon Powershot A-40
- Beany Bear
- Blue blanket
- 2" 1/4x20 bolt
- Jorgensen wood clamp
- blue thread
- straight pins
Software:
- Sony Screenblast on a DELL Latitude 650 Mhz PIII.
- Linux tools on a generic 1 Ghz PIII.
- mjpegtools
- Tcl/Tk
- ImageMagick
- timidity
- sox
|

+

= Movie
|
The only thing that doesn't exist in most homes these days is the beany
bear, and maybe the wood clamp. If you don't have a Jorgensen clamp,
you can pick one up for about $10.00 at a Loews, Home Depot, or your
neighborhood hardware store. If you don't have a beany bear, you
can use some other toy. Anything that bends is an actor for stop-action
animation (See Mike Jittlov's
Wizard of Speed and Time for a great example of dancing
film equipment).
Procedure
I draped the blanket over the couch and across the floor. This
was the soundstage for this production.
The bear was placed on the soundstage with thread tied to its head and
one foot. The other end of the thread was tied to a straight pin. This
was the precision positioning equipment. By tweaking the bear, or
moving the pins, I could force the two legs and head into the position I
wanted.

|
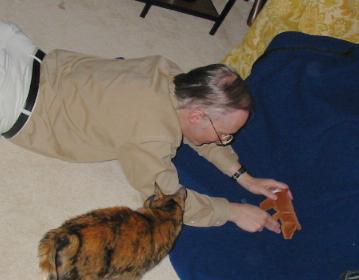
Here's a picture of the director on the soundstage working with the cast
while the executive producer oversees the procedure.
|
|
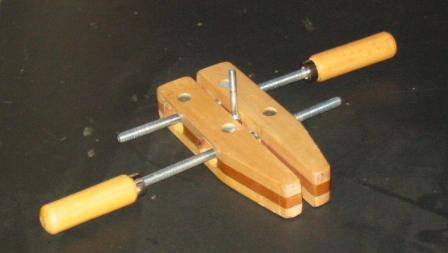
The 2" 1/4x20 bolt was clamped in the Jorgenson clamp, and the
bolt was screwed into the Canon Powershot A40. This is the custom
tripod. (OK,it's not actually Jorgenson brand clamp, it's one I
made from a kit and some maple and cherry scraps a few years ago.)
|

|
Camera! Action!
I set the camera for 640x480 images, closeup, with a 2 second time
delay on the click, and zoomed to a reasonable level.
Pressing the expose button got me a series of beeps, with plenty of
time for me to get my finger off the button so the "tripod" could
stabilize and get a decent shot.
I moved the actor by eyeballing it, nudging it, and moving the pins
around. If you want to be serious, you can make some sort of pointer
or put a grid behind the actor when rearranging it.
When the actor walks, or otherwise moves, actually move it
across the stage. It makes your life simpler in the editing
stage if you don't have to pan the image to make it look like
the actor is moving.
I used the flash for these images, rather than finding enough lights
to turn on. It appears that the exposure is not as reproducible as one
might like, and the brightness of the bear changes from shot to shot.
Next time I'll try to find enough lights, and see if the problem is varying
light from the flash or exposure time in the shutter.
Preprocessing the still images
I took about 40 shots of the bear moving. The shooting time was
about 3 minutes.
The images can be moved directly from the camera to the
desktop, and into the Media Pool, and dragged onto the
Screenblast Video bar. Once there, they can be stretched
for whatever time is reasonable, and various effects applied to
each image one at a time.
This was interesting for a 5 or 6 image section to see that the bear
really did walk. Dragging, stretching, setting the FX, etc for each
image for a 2 minute movie didn't sound like fun to me.
It made a lot more sense to take the images, do whatever preprocessing
I needed to do, and merge them into a set of MPEG files that I could
treat like film clips.
The images got copied from the camera to a Linux system where I did
the preprocessing from JPG images to an MPEG file.
|
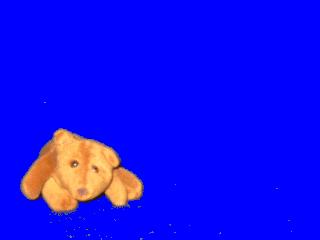
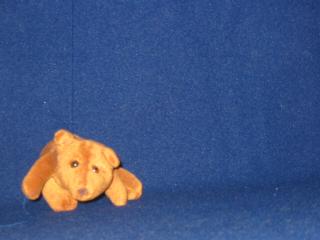
As you can see, the blanket does not provide a perfectly uniform shade
of blue. The Screenblast package will chromakey on a range of colors,
but this can be ugly if there are any sets of similar colors in the real
image. I had trouble finding a range of colors that would remove the
entire blanket without making parts of the bear also transparent. I
didn't want this movie to be The Ghost and Mrs Bruin.
|

|
So I hacked a quick Tcl script to walk through the image and convert
pixels that had significantly more blue than red and green to pure blue.
This meant I could select the Pure Blue Screen option off the
Video FX/Chroma Keyer selection, which saved me from having to
select color ranges, and just worked.
The preprocessing steps for the images was:
- Convert the images from 640x480 to 320x240. A more reasonable
size for a TV type image, and a bit quicker to process.
- Convert all near-blue pixels to pure blue
- Assemble JPG images into MPG files, one per image
- Combine the MPG files into a single MPG data stream
- Convert the MPG data stream into an mpeg format file for import.
In command terms, it looks like:
  # Preprocess each image into the proper size
  # .mpg file
  # This is repeated with a different file name replacing foo on each step.

  foreach foo in a collection of jpg files {
    convert -size 320x240 foo.jpg foo.gif
    wish bluefilter.tcl foo.gif
    convert blue_foo.gif blue_foo.jpg
    jpeg2yuv -n 8 -I p -f 25 -jblue_foo.jpg |  mpeg2enc -f 8 -oblue_foo.mpg
  }


  #  Collect the mpg files into an mpg data stream

  cat blue*mpg >collected_foo.mpg

  #  Encode the mpg data stream into an importable format.

  mplex -f 0 -o foo%d.mpg collected_foo.mpg
In real life, I wrote a Tcl script to handle the control
loop, and a separate little Tcl application to do the blue-screen
preprocesing.
The final foo1.mpg, foo2.mpg, etc files can be imported into
Screenblast.
With a song on my disk
The music was acquired from the web. I found interesting
music as AU audio files, and as MIDI soundfiles.
The Chinese music came from the China Music page of
Purdue University's Multicultural Homepage project.
It's a small section of The Moon Mirrored in the Spring.
The MIDI piece is The Bear Came Over The Mountain played by Brent
Bailey, and provided by Bill Basham of
Diversified Software Research.
The good news is that there is a lot of decent free music available for
an amateur projects on the web. The bad news is that it may not be in a
format you can use.
Screenblast will accept OGG or WAV files, not AU or MIDI.
I converted the AU to WAV on a Linux box with sox.
sox moon_pt.au moon_pt.wav
And converted the MIDI to WAV with timidity
timidity -Ow -c /usr/share/timidity/patches/timidity.cfg bear.mid
Editing the movie with screenblast
I put in the music tracks first, since they were just drag
and drop into place on the Music event bar.
I had several images that I took on a trip to China that I thought
would be useful for movie. The only Idea I had for a script when I
started was The Bear Comes over the Mountain, so the shots of the
Chinese mountains seemed like a good thing to play with.
I added the opening video shots first, just because they
were easy. Just drag the image from the Media Pool
to a spot on the the Video bar, and stretch it to a
reasonable size.
Since my camera does a 1600x1200 image, and the screen size is 320x240,
there is plenty of room in the image to pan and crop, making a still
background shot look like a panned movie shot.
When you click the FX box on a selection on the Video bar,
the popup gives you a chance to select a cropped area and
pan location for the begining and end of the sequence. Screenblast takes
care of smooth panning/zooming to fill the intermediate sections.
Then I decided which mountain image had something that looked enough
like a flat spot for a bear to walk on, and used that as the backdrop
for the rest of the shots.
The bear mpg files were arranged in the Video Overlay track, and
chromakeyed (From the Video FX notebook tab), flipped
horizontally, and panned (in the FX Pan/Crop panel) as necessary.
I only had about 40 bear images that I used in this animation. By
flipping them, changing the order, zooming in on the face, and such,
the animation looks like there are a lot more images.
On my first go, I put all the bear video slices onto the Video
Overlay track, and then tried to think of something for a vocal
track.
I played the movie silently within Screenblast with the Voice
record button enabled and talked into a cheap Radio-Shack computer
microphone.
This is what you call sub-optimal, and proved that I have little
skill for time-sensitive improv comedy.
On the next go-round, I thought of something to say, and recorded
the vocals as small snippets, one or two lines each, and synchronized
these with some bear video snippets by dragging them along the
Video Overlay and Voice tracks as appropriate.
This was much better for the spoken parts, but was just plain bad for
the bear singing to the music.
So, after I arranged everything, I went back using the Voice
record button to overdub the bear singing onto the Voice track.
I listened to the music on a set of headphones while singing, to avoid
feedback problems.
The thing to watch is that the recorder starts running as soon as
you press the red button. No problem if you're ready for it, but it
might surprise you.
On my first go-round, I thought about credits last, and had to move
everything around to make room. On the second attempt, I
put the titles in first.
The Text & Backdrops popup dialog made this fairly easy.
Finally, making the movie.
The AVI format is certainly fastest, but the file is huge. For this
2 minute movie, the AVI file was a bit over a gigabyte. The MPG-1
compression makes a decent sized file (22 Meg), and works.
The MPG-2 never worked for me. It made a movie with plenty of audio,
but only black image. Rather boring, though perhaps an improvement
over my animation.
The Real Video output worked, but it is far and away the poorest quality
video. The credits were unreadable, and I couldn't always tell what the
images were supposed to be. If I'd started out with a Real Video
frame time and resolution, it might have worked better.
Summary
The fact that someone with absolutely no film-making experience beyond
shoving a DVD in the player could make a short movie in a weekend is
pretty amazing. Screenblast does most of what I wanted, has good online
help, and mostly does what I'd expect. It's plenty responsive even on a
relatively slow 650 Mhz PIII laptop with 128 M ram.
Not having all the movie output formats work is annoying. The online
reviews of Screenblast say that trying to burn a DVD from Screenblast is
also flaky. I intend to do DVD burning and format conversions on the
Linux box, so that doesn't bother me.
The largest single annoyance with Screenblast is that there seems
to be no way to edit the titles after you've created them. Whenever
I reopen the title clip (Right mouse/Properties), it opens
with the text fields all empty. Having these be retained for
future use, and being able to edit (even with arrow keys; I don't
demand Emacs or VI support), would be very useful.
The second problem with the text overlay is that you have three
possible formats, and I really needed a couple more. The real
problem was that the Purdue web address would not fit on the page
without going to a font so small that the other single-line
items were too small.
Another shortcoming of Screenblast is that you can only have one
FX window open at a time. For a normal type movie, this is probably
not a problem, but with the way I was doing stop-action, I wanted to
seque smoothly from a pan/zoom into the scene to a static background.
Having crop/pan windows open for the last frame of one clip and the
first frame of the next would make it easier to set the
pan/crop settings on the frames. Being able to open 4 windows,
to view and modify the background and the overlay on the frames
all at once would be ideal.
The mix of Linux and Windows software was a help. As a rule, I find
that Windows software is great for something I don't do often, and expect
to put a lot of manual effort into. Linux software is much better for
bulk processing data. Any sequence of actions that will be repeated
without manual tweaking is better done with Linux tools.
The Linux video tools are a bit rough, and it's not always easy to find
a set of tools that will work with any given distribution. I finally
ended up on Debian, and with some forcing managed to get the
mjpegtools
timidity and
timidity-patches packages installed.
There's a good write up on using Linux tools to create a video in
Linux
Journal.
Overall, I like Screenblast. It works. I'm impressed with the Linux
tools. They work also, and cheap as Screenblast is, free is cheaper.
The range of tools you can find for Linux is amazing. The combination of
Windows GUI software and Linux bulk processing is a powerful
combination.


